Monday, April 2, 2018

Thing 43: Google Drawings


Thing 43: Google Drawings
Having just finished the “green screen thing” and dabbled with Google Drawings a little bit, I was very excited to see an entire “thing” lesson devoted to Google Drawings. I really like the versatility of this tool. I checked my library’s MacBooks for the Drawings app, and upon discovering it wasn’t included in the “ready to go” apps, submitted a request to my Tech Support department to have it added. Luckily it was easily accessible just by searching for it in a regular Google search. It then automatically saved in my students’ Google Drive.

I started by exploring some of the great ideas included in Get Creative with Google Drawings by Tony Vincent. I loved his ideas for how to use Google Drawings as a whiteboard tool, and his “how to” examples, just as how to make a copy of an existing template for personal modification. He even provides 15 graphic organizer templates with freedom to use and adapt. He notes that “by making the graphic organizers digital in Google Apps, they instantly become customizable. Multiple people can collaborate on them in real time. They can be shared with a link, embedded in a website or downloaded as an image file.”  So helpful, and this was just 1 of 6 tools related to using Google Drawings for “fill-in activities”. There are also links to Eric Curts’ Question Chart and ’ Sandwich Chart - color , as well as a Life Timeline Template , a Somebody Wanted But So Then Template where students are prompted to write a story following a story arc and six graphic organizers, including documents for main events, main idea, predictions, and story elements. So many helpful tools!  There are also sections for “Arranging and Sorting Activities”, “Labeling”, “Hyperlinked Activities”, “Hyperdocs”, “Infographics”, “Magazine Covers”, “Math Activities”, “Games”, “Comics” and more!  Amazing!

Next I checked out the “Intro to Google Drawings” video tutorial at https://www.youtube.com/watch?time_continue=9&v=u2UmPAclbL4 to see if it’d be helpful to use with students to get them started. Alice Keeler’s tutorial “ Getting Started with Google Drawings” seemed a bit more advanced than the video tutorials I’ve viewed, but will definitely be helpful down the road when working with slightly advanced users. I also bookmarked Robin Limpert’s Series of Google Drawings Tutorials: Introduction, Day 1: Background & Working with Shapes, Day 2: Adding a Text Box or Word Art, Day 3: Drawing Lines

Google AutoDraw feature is something that I think might come in handy for students who claim they can’t draw (neither can I!). Your apple example was amazing! But again, I’ll save this feature for later down the road after we’ve mastered basic Google Drawing projects.

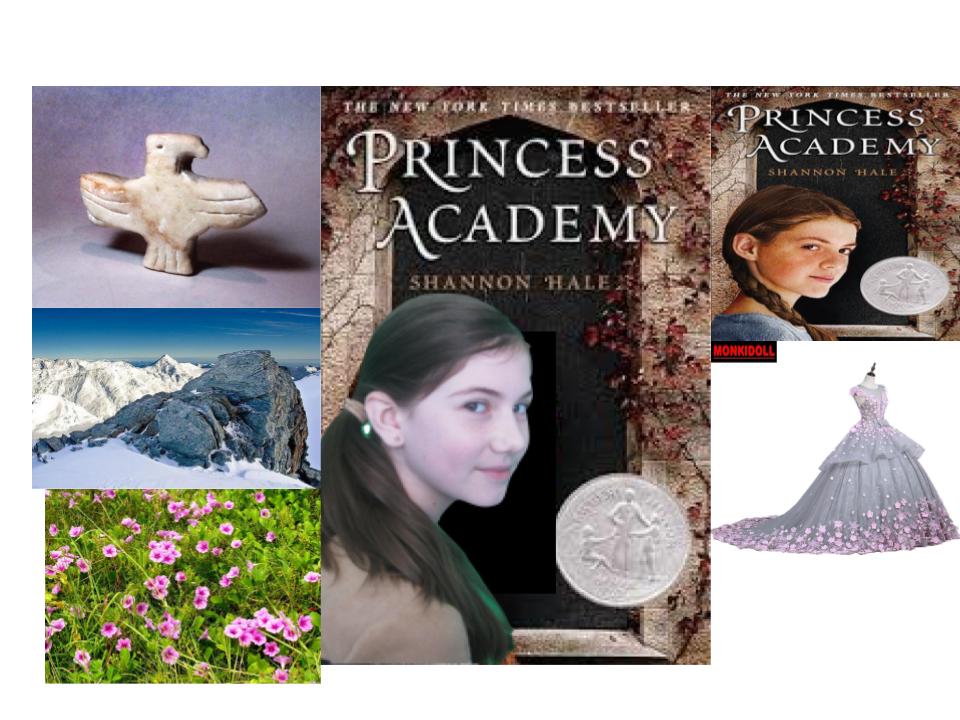
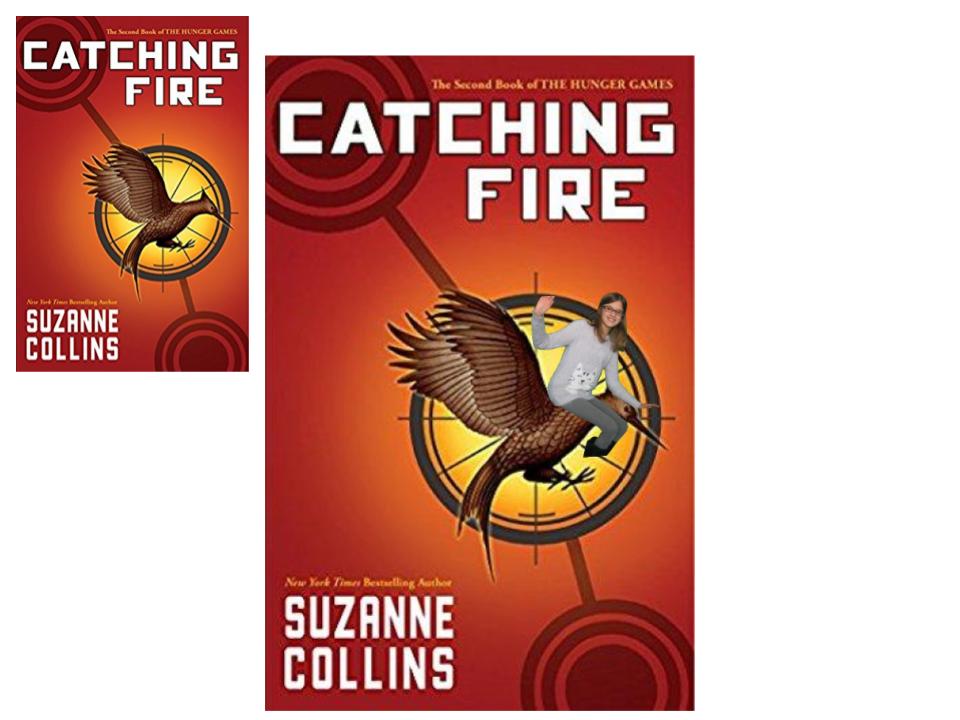
LEARNING ACTIVITY: I loved several of the project ideas included for possible learning activities. However, I already had an idea in mind and wanted to implement it was part of the follow-up to my green screen “thing”. I decided to move forward with a green screen and Google Drawings project with my 6+ Enrichment class. Each student selected a favorite book they have read and are using it to create a “Book in the Box” project. They will each decorate a cereal box to represent their selected book. Inside the box they are required to include vocabulary from the text, questions & answers about the book, and 5 items that represent key elements of the story (they include images of the items if too large to fit in the cereal box). Then they do an oral presentation of their project that includes at least three literary elements found in their story. I decided to implement Google Drawings into this project by requiring each student to examine the cover image of their book, figure out how to position themselves in front of the green screen in such a way as to include their own image or face on the book cover, and then use Google Drawings to edit (photoshop) their image onto the book cover. A few students have finished the editing process and they look amazing! I’m so thankful to this “thing” for teaching me how to use Google Drawings. It is so much easier than Adobe Photoshop (for me) and gives students an alternative as well. Thank you for another great “thing”!  Here are two examples from my class:


Thursday, February 15, 2018

Thing 5: Presentation Tools (updated for 2017/18)


    Having been an avid fan and user of Prezi for several years, I was extremely disappointed when the Prezi platform totally changed and became “Prezi Next”. This new version is not as user friendly and has many glitches.  Up until this change I taught Prezi in 6th grade and then did a refresher on it with our 8th grade ELA students for a collaborative project I did with that teacher. Last week she asked me to get ready to do that lesson again, and sadly I’m in need of a new presentation tool.
    Lucky for me I am ready to start my next “thing” so to the list I went, looking for an activity that would be give me ideas for new presentation tools to try. I wasn’t let down and was so excited to see this “Thing 5: Presentation Tools (updated for 2017/18)”. I browsed through the list of resources and decided to start with Powerpoint Alternatives since this was basically what I was looking for.
I was already familiar with Adobe Spark (LOVE it) but was looking for more of a Google Slide replacement presentation format. I scrolled through the list looking for student-friendly, free options. The first one I chose to explore further was Projeqt since it sounded perfect. Sadly I was met with the following message when trying to experiment with it: Attention to the Projeqt community: It has been a pleasure to have you as part of our Projeqt community - thank you for your support. We are sad to say we are concluding the ability to create new Projeqt presentations and sign-up for new accounts. In addition to this, we’re also ending support for work done/kept on Projeqt asa platform. Should you have any urgent questions, please contact us. So my quest to find a new presentation tool continued.
HaikuDeck is fee-based, so that was quickly ruled out. Next up was Buncee. The homepage description sounded promising, so I clicked on the “For Schools” tab to learn more, but wasn’t motivated to go beyond at that point. I thought Presentation Zen was going to be a tool for presenting, but seem to have been mistaken; it seems to be more like a philosophy or presentation style, so my search for a Prezi replacement continued! The Cool Tools Wiki Site seemed like a good next step, but upon clicking the link I was immediately alerted by the following message across the top of the screen: It's time for us to say farewell… Regretfully, we've made the tough decision to close Wikispaces. Find out why, and what will happen, here . Really felt like I was batting zero on this “thing”! Thankfully the final article mentioned the Canva presentation tool. I was able to immediately sign in with Google and begin creating.

LEARNING ACTIVITY
    The 8th grade ELA teacher recently asked me to collaborate with her on a Ted Talk project. The first phase is a brush-up on research tools, and the second step is assistance with presentation software. In the past we’ve done Prezi, but due to the problems I mentioned earlier, I decided to introduce students to Canva and use that as their presentation’s visual component. To learn how to better use Canva, I created the following practice project for my learning activity: https://www.canva.com/design/DACvY-sZOZE/gq1VtG5I85bYerrW9FlEmA/view?website

I love how students can easily sign in with their Google accounts and get right to work. No fees, no hidden registration steps or verifications needed. It was simple and easy to figure out and I was able to complete the above practice project in about an hour. I will actually use this Canva with the students to introduce the presentation tool.
    I’m so happy to have found a replacement for Prezi since I really want students to be challenged with new Web 2.0 technologies and presentation tools. Google Slides is becoming too common - Canva will help spice up presentations with something new. Thanks for another great “thing”!


Friday, February 9, 2018

Thing 37 Green Screen Fun


Thing 37 Green Screen Fun

I was very excited to see this thing. I have a new green screen media room in my library media center this year, and have been trying to come up with ideas for how to use it. This “thing” came at the perfect time as I’m starting with a new class for second semester.  Polly’s example with her critters looking at the northern lights was adorable, and made greenscreening sound easy! I decided to jump in.
    The first thing to do was to figure out which of the recommended apps / tools could be used on the student MacBooks that my students have access to. I logged in to one of the laptops as a student and began experimenting. I first checked Do Ink, but sadly it said it was only compatible with iPhone and iPads. (Although I may still introduce it to my son at home since he has an iPad he could try it on.) And the same held true for WeVideo.
    I decided to see what ideas there were in “You don’t need a green screen app” section, hoping I would find some MacBook friendly ideas. I started by reading the article Free & Easy Green Screen Editing – How to Make Transparent Backgrounds to see what that was all about. I was super excited to see that this worked on my MacBooks!  I watched the tutorial and practiced using the “Instant Alpha” feature in Pages and Google Drawings. So easy!! The tutorial videos were so easy to follow. I plan to use this with my 6th grade classes ASAP - they are going to love it! The first video I watched at https://www.youtube.com/watch?time_continue=248&v=YwZUnIzKSxw showed how to remove the background using the instant alpha tool. The video tutorial at https://www.youtube.com/watch?v=j_USxy-dwv8 explains in detail how to add backgrounds and edit the images.  Layering is also explained and everything is super simple. I’m not a photoshop person, so knowing how to do this with Pages & Google Drawings is opening up new worlds for me and what I can use my green screen for with my students. So excited!

    LEARNING ACTIVITY
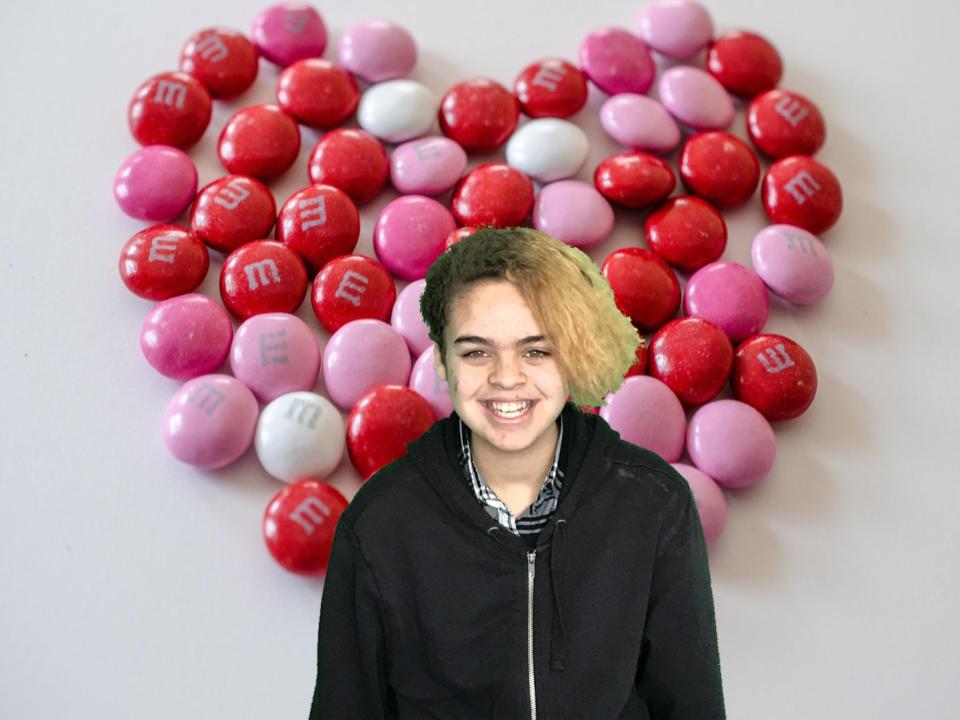
Now that I knew how to use the Instant Alpha tool with Pages on my Mac, I wanted to test out how to use these features on my Dell computer. I watched the tutorial for Chromebooks and learned that Lunapic also works on my Dell desktop. I took a photo of a student who happened to be in the library at the time in front of my green screen, and followed the steps in the tutorial to successfully place her in the center of an M&M candy valentine heart. Here’s the image I created for my learning activity:
    I can’t wait to introduce this to my students, and plan to do so during our current author study project. They can greenscreen images of the book covers or other author-related pictures and use them as part of their media projects. I also loved the idea shared by Nicole Rosen for putting the students’ faces onto their favorite book covers! I might do that, too! Thanks for another awesome “thing”!

Wednesday, January 24, 2018

Thing 36 - Web Presence (New for 2017-2018)


Thing 36 - Web Presence (New for 2017-2018)

As I read through the updated assignment for thing 36, I  thought about my use of Blogger (which I use for this course) and Weebly (which I’ve used in the past in my personal life). Both are straightforward and easy to use, andI like both equally.  It’s great that II can continue adding to the same blog via Blogger for each new session of Cool Tools. It’s very useful to have this a reference for myself when I want to revisit the tools I investigated in each of the “things”. I looked at some of the examples and particularly liked how The Brown Bag Teacher used her site to both explain how to use it while also showing examples of how it actually looks. Great visual!

My District uses Google Classroom but not Google Sites for individual teachers. I looked at some of the examples to see how they might be set up.  The Sunset Reads site is a great idea, and ideal for club announcements. As advisor for both my school’s Yearbook Club and Book Club, I might try my hand at setting one up in the future.

I didn’t spend much time on the Professional Portfolio section. I know it’s a good idea, but at this point in my career I have a system for keeping track of my APPR materials. I have a folder in my gmail set up where I organize messages for each category, and a folder in my Google Drive where I keep documents I may want to access later.

My main focus for this “thing” was the LibGuides. I had touched on them during my first thing (Search Tools Ninja) and Polly’s comment about them being further explored in thing 36 brought me here next. My District purchased a subscription for each of our four buildings, but so far I am the only library media specialist to tackle them. As soon as I get more comfortable I will teach the HS media specialist. Personally though, I don’t see the need for them at the elementary level, and will likely not renew for my K-5 buildings. But for secondary level grades and collaborative projects with core area teachers, they are super! I was amazed to explore some of the LibGuide examples and see one for Empire State Information Fluency Continuum , which provides support resources to SLS Directors integrating the use of the ESIFC and Common Core Learning Standards. What a resource! I am going to figure out how to add that to a new link on my page for “librarian resources” for future reference.  

LEARNING ACTIVITY
The Science7 teacher asked me to do a research project on the elements and periodic table with her classes the week we return from break, so I decided to focus on creating an official libguide for her as my thing 36 learning activity. Last year when I was first introduced to LibGuides I had tried replicating one on my own website without a LibGuides subscription. The result was okay, but nowhere as polished-looking and easy to use as the official site that my District now subscribes to. Check out my finished product for this year at https://millbrookcsd.libguides.com/elements and you’ll see a decent collection of resources for the project.

Tuesday, January 23, 2018

Thing 27: Teaching & Learning with Primary Sources


Thing 27: Teaching & Learning with Primary Sources
As suggested in the introduction, I got started by watching the very helpful  Primary and Secondary Sources Explained video.  The example of the Great Storm made it easy to understand the differences between primary and secondary sources. This would be a great video to use when introducing (or reinforcing) this concept with older elementary/middle school students.
Selecting which articles and digital collections to explore was at first overwhelming - so many sounded good that I wasn’t sure where to start, so I decided to just jump in! I liked the sound of “classroom-ready” in the description for Engaging Students with Primary Sources so I decided to start there. Of course, little did I know it was a 64 page PDF document I was choosing to “jump in” with!  But it was excellently organized and easy to understand; I could easily scroll to pages that were most relevant. I liked the “strengths and limitations” listed for each type of source, and most sections included links for actual primary source resources.  I downloaded a copy for future reference as well.
    Next I read through the article 5 Online Activities for Teaching With Primary Sources for ideas I could use with my Middle School classes. Author Richard Byrne actually provides links to his class handouts and worksheets, so these activities are literally ready to use! Sadly, the article’s link to “Historical Scene Investigation” is no longer active, but I plan to see if I can find that resource on my own.
    The third and final article I read was 10 Resources for Teaching With Primary Sources written by the same author as the article above and featuring the video featured at the very beginning of this “thing”! Links to resources such as the World Digital Library and LC’s Student Discovery Sets are provided. Like the article mentioned above, a couple of the links included in this article are no longer working (such as  National Archives Experience Digital Vaults) , but overall this is a really nice collection of go-to resources for teachers.
    Next it was time to explore some of the Digital Collections listed! I decided to click through all of these to see how they differed and which ones I felt would be most Middle School student friendly.  I began with Digital Public Library of America and as I continued going through these links for various digital collections, an idea for this “thing’s” learning activity came to me. I decided to create a “Primary Sources” resource tab on my library webpage for use by both teachers and students. (Must say I was very pleased with this idea!).
    After curating the logos, links and descriptions, I was able to put together a decent looking resource which can viewed by clicking on the green “Primary Sources” tab on my website at http://mms.dboces.opalsinfo.net/bin/home . I also shared some of these resources with my grades 7-12 social studies teacher and have been receiving notes of thanks from many of them. Thanks for another great “thing”!


Thursday, January 11, 2018

Thing 26: Note-Taking Tools


Thing 26: Note-Taking Tools

After reading the introduction to this thing, I took a moment to reflect on my own note-taking skills. I tend to mark up written materials with my notes (on the hard copy paper) and then rewrite them while typing into a digital document. This helps me organize my notes as I go. I was very interested to investigate some of the note-taking tools being introduced through this “thing”.

To get started, I read through the article
Laptops Are Great. But Not During a Lecture or a Meeting . It made several great points in support of not using laptops during lectures, especially at the high school and college level. It makes sense to me, because how can students be listening, assimilating, thinking, AND typing all at the same time without some of the meaning being lost or forgotten? Also interesting to me is the concept of “visual pollution” and how one person’s use of a laptop can take away from the learning experience of a student not using one.

The quick reference guide
Note Taking Tips for Different Learning Styles is a helpful reminder to me as a teacher to encourage my students to take notes in different ways and use techniques that best support their learning styles. And of the 5 tools evaluated in The Best Note-Taking Apps of 2017 , I had only heard of one (and never used any of them).

LEARNING ACTIVITY

Next it was time to explore some of the suggested tools. Since I’ve “adopted” many aspects of Google apps, I decided it made sense to check out Google Keep. I had never heard of this before. Scrolling through the main page of “Keep”, I was amazed to see that it seems to meet many needs that I’ve been thinking about. You can add photos, notes, and audio, and Keep can be used to help with things such as the examples on the webpage:
    1)
Need to remember to pick up some groceries? Set a location-based reminder to pull up your grocery list right when you get to the store. Need to finish a to-do? Set a time-based reminder to make sure you never miss a thing.
    2) Share your shopping list with family members and watch the items get checked off in real time
    3) Quickly filter and search for notes by color and other attributes like lists with images, audio notes with reminders or just see shared notes. Find what you're looking for even faster, and let Keep do the remembering for you.
    4)
Keep works on your phone, tablet and computer. Everything you add to Keep syncs across your devices so your important stuff is always with you.
    After watching the Tutorial at
 https://youtu.be/TLvU2SWFZZA , I decided to download the Keep app on my iPhone and try it out, as well as experiment with it on my desktop Dell computer. It seems super easy to use, and has many features that make it enticing. Since I’m not already familiar with EverNote, but do enjoy the Google Suite of apps, I am thinking that Keep may become a regularly used tool for both school and home use. I can imagine using it for school when I want to keep a quick note about a particular class or class period; maybe something pertaining to a student in that class. Also, as the Library Media Specialist, I think this might be a great way to keep track of my book recommendations for my library regulars. Right now I simply jot down book titles that I think certain students might like on random sticky notes or in my planbook. I’m thinking that by using Keep, I can create a separate note for each of my frequent visitors and easily add book suggestions to their particular note as I come across them. That way the list of titles will be easy to access and reference when the student comes in. (Right now I have to search for where the sticky note landed or flip through my planbook to find the page I wrote my suggestions down on.)  So I can see this as being a great timesaver!  I also love the collaborative, real-time feature, and can see myself sharing notes with my husband for to-do lists and shopping lists, etc.  Helpful both at home and school!  I’m so glad I was introduced to this new Google feature I had never heard of.

Monday, December 18, 2017

Thing 9: Search Tools Ninja


Thing 9: Search Tools Ninja

I got started by going through my blog and writing down all of the “things” I’ve completed throughout the Cool Tools courses. I wanted to see what topics I’ve never explored, and also find out which ones I did the longest ago so I could focus on the updates this year.

The Search Tools Ninja stood out as something different, so I decided to explore this “thing” first. I read through the assignment description and did indeed find some articles of interest.  I decided to click on some of the suggested web search tools. DuckDuckGo and CarrotSearch both sounded intriguing but just look too basic and simplistic to be appealing. The search results seemed average, but they are not something I see myself using.

A very interesting thing happened when I tried the MillionShort web search tool. For my query I entered “fake news”. Without eliminating any sites, the first page of results featured sites like Wikipedia and FakingNews blogs. When I clicked on the box to eliminate the first 100, I was left with more authoritative looking sites, such as Snopes, NPR, and FactCheck.  The better sites seem to appear deeper in the results list for this particular search anyway. Good eye-opener as to why quality key-word searching is so important.

I took some time to read the article Search Smarter: 30+ Google Search Tricks You Might Not Already Know and Six easy ways to tell if that viral story is a hoax. Both offered great tips that I will keep in mind for both my own searching and when teaching my 6th grade Digital Literacy class.  Something new to me is Google’s “reverse image” search, which can be used to verify the original source of images. What a great tool to use when verifying online news posts and battling fake news, and great tools to expose students to! I also love the YouTube Data Viewer to see if videos are really what they claim to be. Great resources here!

Lastly, I had heard great things about LibGuides the past couple of years, and asked my District to purchase a subscription for our schools. I’ve had them since September, but have just recently started being able to understand how they work. I was excited to see this listed for this “thing” because I’ve been wanting to make the time to learn how to make better use of my LibGuides subscription. I presented about LibGuides briefly at my faculty meeting to see if any teachers would be interested in having me create one for them (I wanted the practice and this was the perfect time to dive in).  

LEARNING ACTIVITY
The Science8 teacher took me up on my offer from above, and I’ve been working on a LibGuide for her which she will be using in January.  It’s not complete yet, but you can take a look at what I’ve done so far by visiting https://millbrookcsd.libguides.com/c.php?g=762166&p=5465148 . I love how LibGuides are meant to be a curated, one-stop shop for students and their teachers. I even figured out how to give the teachers the rights to update the page (although I suspect sending me the links to add for them if they have additional content will be easier for them). Another great thing! I learned so much and plan to use a ton with my Digital Literacy classes.